 |
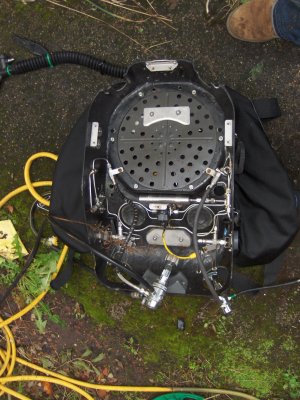
Step 1, gut the
existing unit. Spheres and centre section have been set aside, the old
electronics have been stripped out and sold as spares. Next thing, remove the old
solenoid and fit the new one. The way I did it:
- Undo the compression fittings on the old
solenoid.
- Undo the mounting bracket from the
chassis.
- Remove the solenoid from the mounting
bracket.
- Remove the Swagelok/NPT adapters and clean
off the old tape.
- Tape the fittings and fit in the new
solenoid.
- Fit the new solenoid in the mounting
bracket.
- Fit the solenoid in place, hand tightening
the Swagelok fittings.
- Screw the bracket in place.
- Fully tighten the Swagelok
fittings.
Although the solenoid bracket is also one of
the fixing points for the centre section you don't need to remove the
centre section. I only did it because I'd let the unit sit just a little
too long in the warm weather and the inside tasted... Well, it tasted. It
shouldn't taste of anything so the time had come to Virkon everything.
Lesson learned. Handling the centre section with the lung attached has to
be one of the most terrifying experiences in working on a
Mk15. |
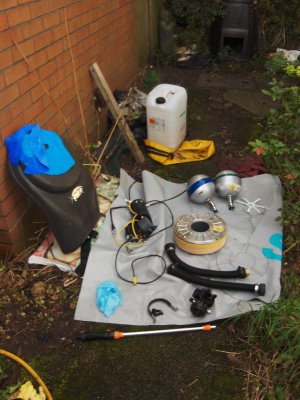 |
Next step, refit all this crap back into the
chassis! |
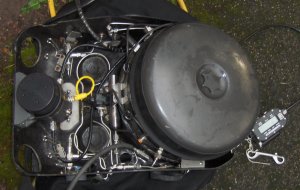 |
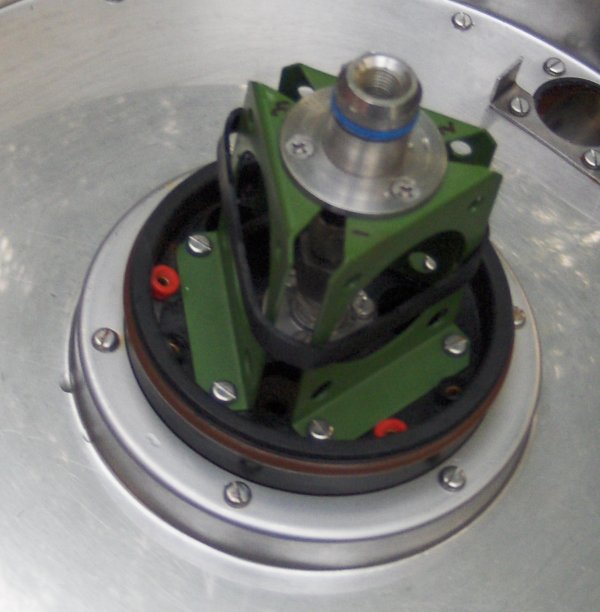
The
centre section has been replaced just to get it out of the way. Did I
mention I don't like handling it? Fitting a thin, irreplaceable rubber
membrane past those stainless lugs is about 8.6 on the sphincter
scale.
With the solenoid in place you can now fit the new pod.
Unlike the old pod, the HH pod is just a junction box. You don't need
access to it, everything is powered and controlled from the handset.
Simply drop it in place of the old pod, fit the stainless bracket and
screw the whole thing down. The HH pod is actually slightly smaller than
an original pod so it rattles a little in the bracket. A wrap or two of
rubber tape round it may happen in the future.
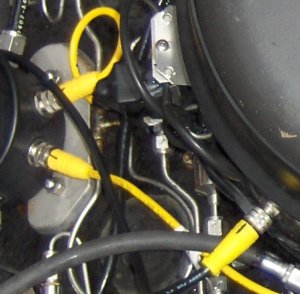
Juergensen Marine
take your old Bendix cable and splice it into the new pod so once the pod
is fitted all you have to do is connect it to your centre section with the
original plug and socket. After that, hook the solenoid to the pod with
the Lumberg fitting provided (yellow cable in the picture).
|
 |
With the pod fitted and the centre section connected
then it's time to fit the DIVA. This is a nifty little HUD unit with two
modes. It will either flash to tell you if you are at setpoint or not or
it will flash a light sequence at you to tell you the actual setpoint.
Either mode is selectable from the handset. I've got mine on the
green/good, red/bad mode as it is similar to how the original primary
worked. An added feature is the DIVA has a vibrating alarm for situations
that need serious attention. As it is fitted to your DSV then the unit
rattles your teeth so, in theory, should make you pretty
aware.
Also connected is the very
nice Sartek secondary. Carl at Sartek replaced the old Bendix secondary
port on my centre section
with a Lumberg. His secondary is not dissimilar to
how the KISS and various homebuilt displays work: circuit board, panel meter,
trim pot to calibrate and a battery. A very simple digital alternative to
the old analogue secondary. The secondary came on a long cable and the excess
was taken up by a couple of wraps round the pod. |
 |
I always hated trying to
fit the Bendix plugs as they were a pain to get aligned. On the Lumbergs
I've marked a black line just to make life easier. I've never claimed to
be clever and anything that makes life simple helps! |
 |
I use R22DHO cells on my
Mk15 rather than the D10's. These are the same shape as R22D's as used in
the KISS and Inspiration and unfortunately are too big to fit in the
sensor ports. They need to have the tip of the cell removed precisely... I
do mine by tying them down and chopping them with a Chinese meat cleaver,
one crack and the tip is gone.
Normally they go cell face pointed
to the centre of the sensor holder but they are narrower than the port so
need either packed out with some o-rings or left to rattle. I don't like
either so, inspired by the Laguna Research sensor holder, I modified
mine. OK, it's nothing impressive, I just removed the rubber grommets for
holding the D10 sensors in place to give me a bigger hole. |
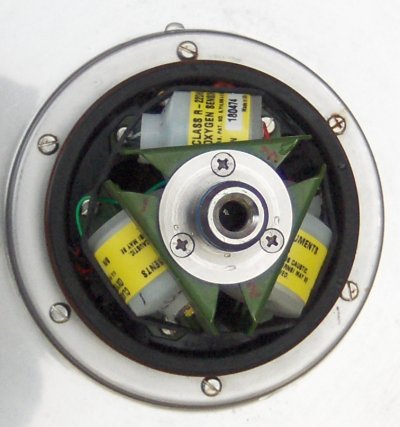 |
The cells are then
fitted sideways and fit perfectly. In fact, it is a nice, tight fit, the
cells do not move at all once in place. The assembly is finished off by
some rubber inner tubing just to hold everything in place. On the surface
they seem to work fine in this orientation and I'll see how they go
underwater. |
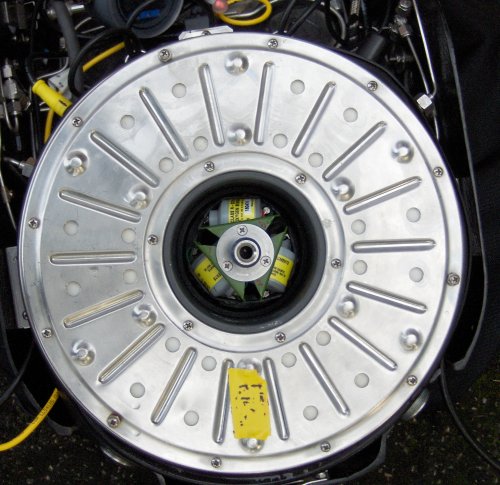 |
Here are the cells in
place with the scrubber fitted. Before there was just enough room to get
the scrubber on and quite a few times I'd clipped the top of a cells or a
wire and pulled a banana plug out of the board. As can be seen from the
photo, there is now a lot of clearance between the cells and the inside of
the scrubber. They could even be fitted with molexes now if I needed to
replace a cell and didn't have the chance to solder the wires
on. |
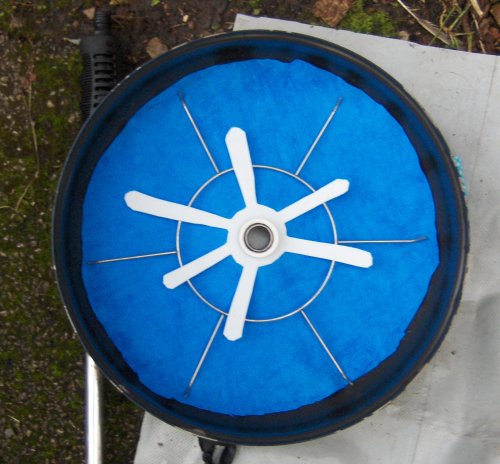 |
This is my "reassure
Dave Sutton" picture. When I bought the unit, Dave was quite concerned
that the top spider was (a) not the right one (it was a bottom spider) and
(b) slightly damaged, so would not retain the top pad properly. Dave
recommended getting someone to weld something up from stainless wire but
being a homebuilder at heart my solution was to cut a spider from the side
of an old sofnalime keg and use it to retain the wire spider. Similarity
to a Nazca spider is entirely coincidental and due to my incompetence with
a pair of shears. |
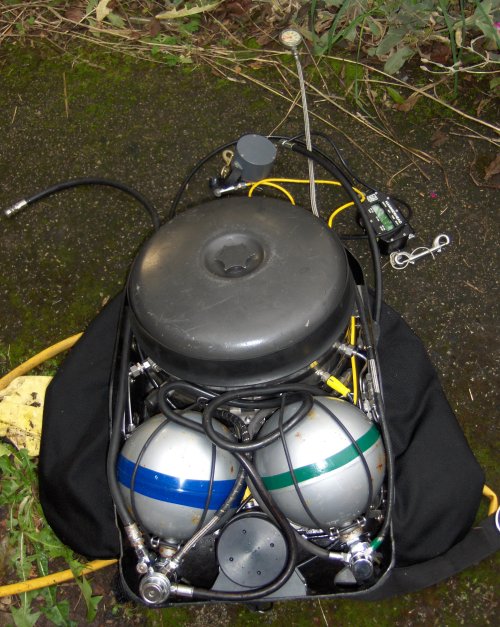 |
The unit with the
spheres in place. The oxygen regulator is original and still retains the
stainless hoses. On the diluent side I needed spare ports for my wing and
offboard connection so I had to go with another regulator. A lot of people
have used Poseidon 1st stages so so have I. The long hose is the
connection to the BOV which is in turn connected to my offboard by a
QC.
I am not entirely happy with the set up, not least because I've
lost the stainless hose advantage. I do have the option of adding offboard
to the loop via the BOV so I am planning to go back to stainless hoses and
no offboard connection. |
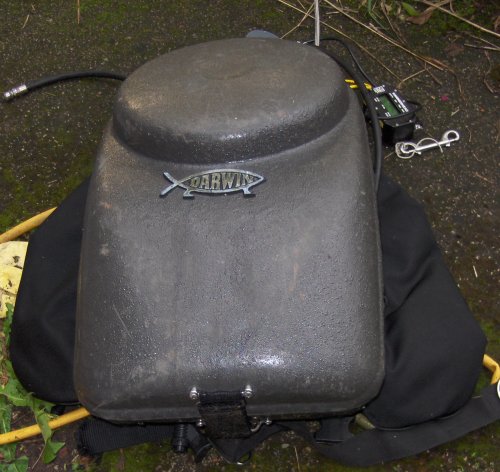 |
Here is the unit with
the case fitted. The unit came without the standard latchess on the side
and is instead secured by a velcro strap at the bottom. I have to say this
is a very secure modification. I have seen more than a few YBOD owners
come back on the boat with their latches popped or the shell loose. The
velcro strap has yet to let me down. |
 |
Here is my hi-tech argon
strap mounting: a couple of loops of inner tube threaded through a couple
of stainless D's. |
 |
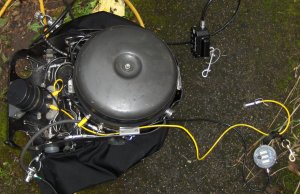
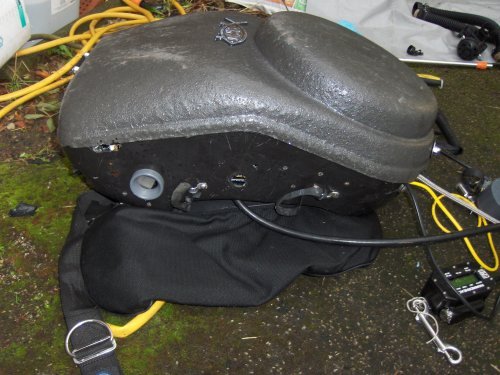
Finally, the BOV and
loop hoses are fitted. The BOV is a Golem model which is well made. I
prefer it to my old Jetsam unit, it breathes better, feels better in the
mouth and the OC bailout switch is very smooth. I always found the Jetsam
version a bit clumsy and a bit big, the Golem BOV has the 2nd stage on the
bottom and the switch on the front.
The DIVA has been fixed in
place with a piece of inner tube looped round it. It was the simplest
(i.e. cheapest) option I could find and seems secure enough. Again, it
needs to be seen in the water to see if it all works.
Also visible
is the Enrique Alvarez split backplate, not overly comfortable on the
surface but very comfortable and very secure underwater. The wing is an
old Zeagle I had knocking around. I made some reinforced eyes in the
cordura bag at the top of the wing to fit the top plate, at the bottom I
extended the existing straps and made them into loops which I threaded
around the bottom plate. It works well and has the added benefit of not
having a favbric centre panel so the perforated counterlung plate is
completely open to the water. How important is that when it is sat on top
of the back of your drysuit anyway? I don't know, it can't hurt
though. |